When changing the front differential fluid it will cost you anywhere from 70 to 130. This includes the estimated labor costs of around 40 to 60 and the estimated parts costs which are from 30 to 70.
Front And Rear Diff Fluid Change Toyota 4runner Forum Largest 4runner Forum
Jack up rear of the vehicle using proper jack points.
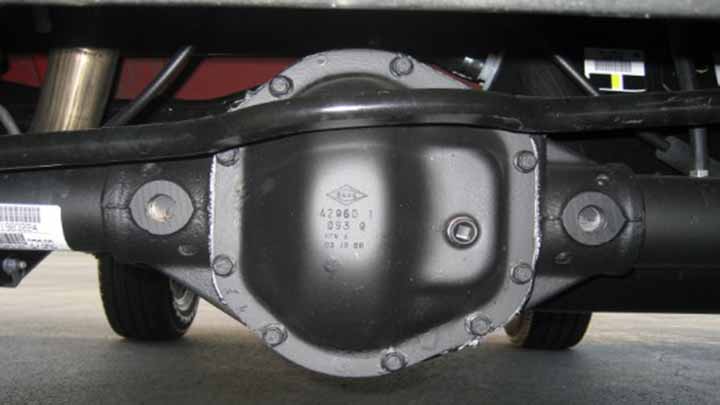
Changing front differential fluid. Using the J1C1109 front VW Touareg differential fluid begin filling the front differential through the fill port on the front side of the differential. Change Rear Differential Fluid on a Polaris ATV. Place a container beneath the differential.
This would involve repair work related to adjusting the backlash and replacing the oil seal of a differential. Check your transmission fluid levels to see if the reservoir is too low and causing gears to grind and slip. How to Change Front and Rear Differential Fluid 1.
How often you should change front and rear differential fluid depends on your vehicle driving conditions and differential fluid quality. Diff oil is changed pretty easy on the 2018 with CVT. Take off bottom bolt drain put back bolt.
The fluid of the rear differential wont need to be. Draining the Differential 1. Super easy the worst part was knocking the old washers loose.
This Is What Happens If You NEVER CHANGE YOUR FRONT DIFFERENTIAL FLUIDIn this video I drain and replace the front differential fluid in my 1995 GMC Suburba. Allow the fluid to drain. How often do I need to replace the differential fluid.
Chock the front wheels. The last step to wrap up your driveline fluid change is replacing the fluid on the Polaris ATV rear differential. Differential fluid can be changed in various ways depending on the vehicle as well as the tools the repair shop has on hand to drain and refill the fluid.
Fill and check plugs are 8mm drain is T70. Locate the fill lower and drain upper bolts on the left side of the differential. Park on a flat surface and set the parking brake.
If you drive your truck primarily on the highway in temperate conditions and rarely tow or haul you likely dont need to change front or rear differential fluid very often. This is still cheaper than having to replace an entire differential which would be between 1000 and 2000. As for changing the rear differential fluid the estimated overall cost is a little more at a range of 80 to 150.
Take off gromit on top fill till oil starts coming out hole put gromit back. Remove the fill bolt before draining the fluid. Thats a vague answer but its true.
Please Like Comment and Share. The differential or gear oil may be in need of replacement after reaching levels too low for proper operation of the transmission. This means you will have new front differential fluid and a new transaxle installed at the same time.
Most manufacturers recommend that the differential fluid be changed every 30000 to 60000 miles. But if you tow a trailer or haul supplies frequently and the temperature fluctuates as wildly as your health insurance premium then you. Make sure you have your drain pan container handy in order to catch the flow of fluid.
Use a hand or socket wrench of the appropriate size to turn the drain bolt counter-clockwise. Make sure you have a sealable container to catch the old differential. Front differential rear differential and limited slip differential LSD all require gear oil to lubricate and keep the differential drive components cool.
The differential fluid is a thick dense fluid designed to keep the differential lubricated as it compensates for all of the turns that the vehicle makes. 140w for back 85 or 90 in the front for the 57 verify the weights for your pennstar. But if you need to completely rebuild a differential then your repair costs will be between 400 and 800.
The front differential fluid in your Chevy should be changed about once every 60000 to 70000 miles. If one of the bearings in your differential becomes loose or if thin differential fluid is causing metal on metal grinding and untimely wear you might. Set on jack stands.
Fill the differential with fluid until you see the differential fluid flow from the fill port. If your differential. In fact you may be looking at changing it every 15000 to 20000 miles.
Some of the more modern shops will possibly own an extractor that will not only remove the old fluid but will also refill with new fluid. During the fluid changing process you will need to have the transaxle replaced as well. DIFFERENTIAL PROBLEMS AND SYMPTOMS.
Lower the Chevy down onto the jack stands. It is a messy job and should be done by a licensed mechanic. Easy to do flat on the ground.
Search amazon for - Slippery Pete Fluid Pump for GALLON BOTTLES or quarts depending on what you gear fluid order. Fill and drain are 10mm hex. Step 1 Jack up the front end of your Chevy and put jack stands in place under the front frame.
The exhaust is on the left side so there is easy access to the fill plug. If your vehicle has a transaxle and front and rear differentials then the front differential fluid may need to be changed a lot sooner than 25000 miles. Remove the drain bolt.
Fluid changes in the front gear case transmission and rear differential detailed here.
May 30 2017 123 0 0 Texas. Park truck on a level parking spot and verify the the key or ignition is in the off position Locate the fuel filter housing between the frame rails in front of the fuel tank Place drain pan below housing and loosen the canister using the 36mm socket and ratchet.
 Locate And Replace The Fuel Filter On A Chevy Duramax 2004 2011
All the 2001-2013 66L GM Duramax fuel filter primerincludes BuickCadillacChevroletGMCHummerSaturnPontiac.

Changing duramax fuel filter. Remove the white plastic water separator from the bottom of the fuel filter with a special wrench available from auto parts stores. Reach through the front passenger side wheel well and remove the plastic guard from the rear of the wheel well. LETS GET THIS CHANNEL TO 13000 SUBSCRIBERSNEED L5P Parts.
1 of 2 Go to page. Lelecar Fuel Filter Head Primer Seal Rebuild Kit and Air Bleeder Screw for 2001-2013 GM Duramax Fuel Filter Housing -Aluminum ScrewBlack Product Description Features. Remove the old O-ring from the separator and push on a new one from your new fuel filter kit.
Press and hold the return arrow or select button depending on model on the right side of the steering wheel. Bi-weeklly How to 27 - Filter change and bleeding the fuel systemTruck used - 04 GMC 2500 - 66L Duramax - Engine Code 2Wix 33960 Spin-On Fuel Filter -. The engines CP3 high-pressure fuel pump is capable of drawing fuel from the tank without the aid of an external lift pump as long as the system remains primed.
Changing the fuel filter on my 2016 duramax 66. Turn the steering wheel clockwise until it stops. Theyre very powerful and capable but theyre also very vulnerable to poor fuel quality.
How to Reset a Fuel Filter Alert on a GMC Duramax Step 1. Empty the fuel from the filter into a drain pan. 12642623 Fuel Filter Housing 66 Duramax Diesel Billet Aluminum Filter Housing Replacement for 2005-2012 Silverado GMC Sierra 66L V8 Diesel 12639277 12664429 35 out of 5 stars 19 5399 53.
99 Get it as soon as Wed Feb 10. Duramax wont start after fuel filter change Thread starter dk2429. Start date Sep 15 2017.
TP3018 Fuel Filter Fit for Duramax 66L 4 Micron Compatible with Chevrolet Silverado 2001-2016GMC Sierra 2500 HD 3500 HD Replace TP3012 19305685 12664429 12633243 46 out of 5 stars 69 1599 15. You shouldnt try and see how long you can go without changing your oil or replacing your fuel filters. Reach in the opening and remove the filter from the frame rail.
Turn the ignition key to. This is a quick and easy video to follow which details how to replace the fuel filter in your Duramax diesel engine in your Silverado or Sierra 2500. Sep 15 2017 1 Literally just got the truck on Wednesday.
YANWEN Professional Water Sensor Wrench Fuel Filter Wrench for 2012 and Newer 66L Duramax Diesel Engines 34900 2013-2017 Ram Trucks with The 67L Cummins Engine 899 8. 2017 Duramax Fuel Filter Change Procedure. A common problem with high-mileage 2001-2010 Duramax trucks is that the fuel filter head assembly begins to develop air leaks.
Luckily this can be addressed by following the proper L5P Duramax Maintenance schedule. 22500 miles or when change. How to Replace Prime a Duramax Fuel Filter Step 1.
Follow the subsequent steps if your truck does not have steering wheel control buttons. Park the GM model truck in a well-ventilated location.
Labor costs are estimated between 57 and 73 while parts are priced between 39 and 86. Its important that you replace the spark plugs on your 22L Honda Accord when the engine is cold or you run the risk of stripping the threads in the spark plug holes.
 How To Change The Spark Plugs On Honda Accord V6 1995 1997 Reset Service Light Reset Oil Life Maintenance Light Reset
Replacement should follow the vehicle maintenance schedule.

Changing spark plugs honda accord. It is possible in some cases that a spark plug might fail before the service schedule but its not typically common. This will be listed in the vehicles owners manual. When considering spark plug replacement for Honda Accord weigh the features of each type.
Some cars require regular replacement at 30k 60k or 100k miles. Even though the job is a breeze you should keep in mind the following important suggestions and tips. This process causes the plug to eventually wear out requiring you to replace it.
In fact some carmakers recommend replacement at 30000-mile intervals. 2009 Honda Pilot Misfire and How to Change Spark Plugs. Its is also recommended to change plugs every 30000 miles.
The good news is that if you do need replace them all they are very affordable. Honda Accord spark plug change. However if your engine codes are indicating misfire check the plugs regardless of the mileage because they may be worn.
When should you replace spark plugs. Common Bad Spark Plug Symptoms. If the spark plug doesnt need to be replaced return it to the spark plug bore.
Always follow the spark plug service intervals shown in your owners manual to figure out when to replace spark plugs. Explaination and step-through video to describe the process of replacing the spark plugs in a 9th Gen 2013-2017 Honda Accord with the 24L K24W Earth Dre. Parts and tools listed below.
Related repairs may also be needed. That being said they still can go bad. Mainly because a spark plugs are so easy to get to.
Maintenance Inspect the threads and tip of the spark plugs for corrosion. If it does need to be replaced use a new one. This article applies to the Honda Accord 1992-2002.
Use a ratchet extension and 58 inch socket to tighten the spark plug by turning clockwise. Use of Anti-Seize on the thread of spark plug is highly recommended to ensure threads dont get damaged while tightening. This range does not include taxes and fees and does not factor in your unique location.
When to Check Change a Spark Plug. Changing the spark plugs at the recommended 105000 mileage interval is the best practice. You should not clean the spark plugs with a wire brush and reuse them.
The average cost for a Honda Accord spark plug replacement is between 96 and 158. How to change spark plugs honda insight. As I mentioned before replacing the spark plugs on the 22L Honda Accord is a breeze.
Something that has changed about modern spark plugs is that many of them use iridium dont need gapped and can last for 100k miles with little issue. Replacing spark plugs is a good idea if you are experiencing rough idling or misfires. Follow this picture guide for step-by-step instructions for replacing the spark plugs in your 2002-2007 Honda Accord.
If you find any corrosion in that area the spark plugs should be replaced. To inspect the spark plugs follow the replacement procedure for removal and reinstallation described in the owners manual. The average price of a 2016 Honda Accord spark plug replacement can vary depending on location.
- Copper Spark Plugs. Not all spark plugs are rated for 100000 miles. The engine spark plugs are essential to obtaining maximum performance.
2008 HONDA ACCORD EX-L - San Leandro Honda Hayward Oakland Bay Area. Replace the spark plugs with a cold engine. Do NOT attempt this on a hot engine.
Types of Spark Plugs Along with copper electrodes modern spark plugs are also made with platinum and iridium which are harder metals that last longer. Honda How To D17 work this week spark plugs timingwaterpump head gasket. If you buy through links on our site we may earn an affiliate commission at no cost to you.
Pay attention to any differences between the inside and outside brake pads to facilitate the installation of the new pads later. Steps for changing your brake pads Remove the wheel Remove the slider bolt Pivot the caliper up Slide out the old brake pads Replace the retaining clips Slide in the new brake pads Retract the pistons Monitor the brake fluid level Reposition the caliper Reinstall the slider bolt Repeat for the other.
 How To Replace Front Brakes Pads And Rotors Youtube
If there isnt room in the reservoir suction out a bit of fluid.

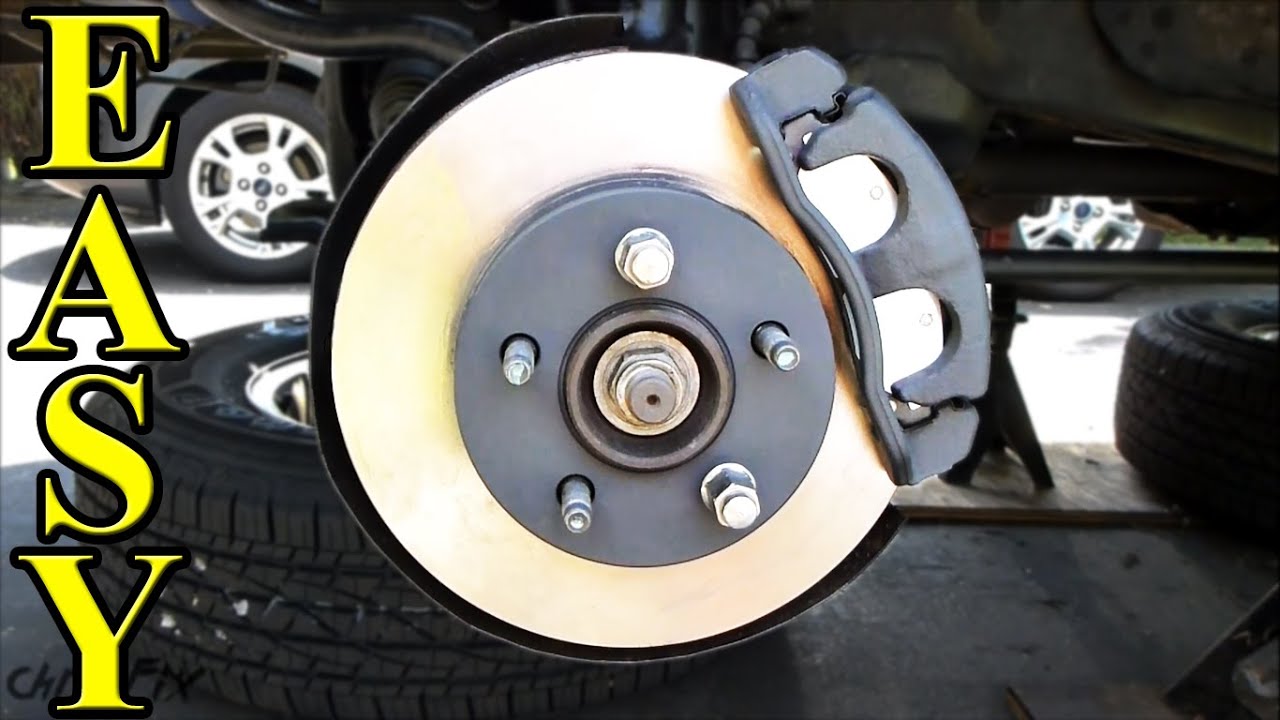
Changing front brake pads. Open the hood and check the brake fluid reservoir. For each type of brake pads ceramic organic and metallic this friction causes small amounts of protective coating to wear away from the brake pad. Changing the Pads 1.
How to Replace Brake Pads and Rotors 1. Any mechanic will tell you that its time to change your brake pads when the lining is in the 3 mm to 4 mm range. Note how each brake pad is attached.
As it wears past 6 mm though listen for the sign that its time. Remove the brake pads by sliding them outward from the caliper mounting bracket. Then compress the caliper piston using a spreading tool or a c-clamp.
With the caliper open you can pull the old pads away from the rotor and remove them from the brake assembly. On most cars the next step is to remove the brake caliper so the brake pads will slide out through the top. If the car or brake pedal has been shaking when braking youll need to have the rotors resurfaced called turning or replace them.
Remove the old pads. Your vehicles owners manual likely recommends inspecting the pads at every oil change because brake-pad life can vary greatly depending on your driving style and whether the car is driven. The first half of your brake pads lifespan is usually carefree.
Remove the brake pads. Check the caliper bolts to see if theyre internal hex or internal star. Find the top 100 most popular items in Amazon Automotive Best Sellers.
Remove the caliper retract the piston. At this point you can spread anti-seize lubricant on the metal contact edges and on the back of. Apply disc brake grease to the back of the new pads to prevent brake noise.
Step 3 - Remove the Brake Pads. Be sure to wear safety goggles and protective. For context know that the standard thickness of new brake linings is 12 mm.
So before you begin the changing brake pads turn the front wheels all the way to one side and crawl under the vehicle with a light. Remove the pads from the caliper and examine the disc and brake lines. A quick guide to changing a cars front brake pads.
They typically snap or clip in with attached metal. Make sure the brakes are cold and that you have the correct tools for the job. Acura ILX 45 out of 5 stars 295.
Clean the brakes using the degreaser and remove the caliper. As the pads wear the piston continues to rest in a more closed position. On a few cars the pads will come out without removing the caliper but this is not common.
Learn how to replace your brakes yourself and save more than half the cost of a shop. Check the brake fluid. Raise the car on a jack then support the car on jackstands.
Honda CR-V CRV 03-15 Accord Civic Element Pilot. If the front brakes have been squealing loudly you may need pads only. Lubricate the new brake pads.
As your brake pads becomes thinner and thinner they will eventually get to the point where they should be replaced. The middle-of-the-road brake replacement option is replacing the brake pads and resurfacing the brake rotors. Then buy a complete set of the correct sockets to have on hand when you start the job.
Loosen the lug. Need new brake pads and rotors. Position a large c-clamp on the caliper and tighten the c-clamp down to push the piston back into its bore.
This will help avoid. Over time this deterioration starts to add up. Put the new pads on.
This way you get a nice smooth surface for the brake pads to press against. If its full some fluid needs to be removed. Resurfacing also called turning or machining your rotors means taking a thin microscopic layer off of the front and rear face of the rotors.
If the car pulls to one side while braking but stays straight otherwise you may need calipers. I show you every step including how to. Step 2 - Remove the Guide Pin Bolt Use one spanner to hold the guide pin and unscrew and remove the guide pin bolt.
Youll see the brake caliper in the 12 oclock position just above the lug bolts at the top of the brake disc. Park the vehicle on a dry flat surface and install wheel chocks. KFE KFE914-104 Ultra Quiet Advanced Premium Ceramic Disc Brake Pad FRONT Set For.
As you compress the caliper pistons the fluid level in the reservoir will rise a bit. Push the caliper piston back in its bore. Remove the wheels where youre replacing the brake pads front or rear.
Discover the best Automotive Replacement Brake Pads in Best Sellers. Remove the brake fluid reservoir cap and check the level.
The thermostat should open at approximately 195 degrees in your Lexus. Unless an engine overheats or fails to reach normal operating temperature after being driven for several.
 How To Replace A Vehicle Thermostat
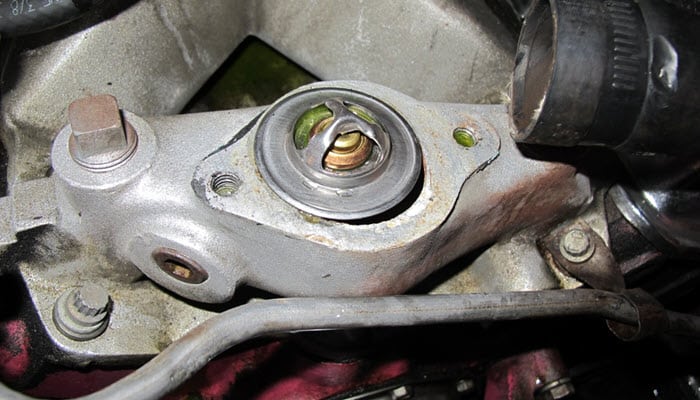
Install the New Thermostat.
Changing thermostat in car. Most often than not though this part is located in close vicinity to the cars water pump on the cylinder head. If the thermostat doesnt sit flat its incorrectly installed. Get a New Thermostat.
This will enable you to locate the thermostat. Loosen the top hose clip then ease off the hose. 5 Remove the bolts that hold the thermostat housing in place and lift out the old thermostat.
In this video Ill show you how to change a car thermostat on a Jeep cherokee 40L I6 engine although all jeep straight six engines will be the same and many. Depending on the engine model this might be difficult for some people. Inspect your new thermostat to find the pointed valve on top and the spring on the bottom.
Use the Appropriate Tool. As we mentioned before automakers shy away from prescribing a set time or mileage to replace a thermostat. Feel the top radiator hose it will be cool to moderatly warm until the thermostat opens at which time the top and bottom hose at the radiator will both be warm.
This means the coolant is flowing continuously keeping the engine from reaching operating temperature. Place the new car thermostat in the recessed groove in either the engine or gooseneck air bleed toward the top. Compare the new thermostat and its gasket with the old ones.
Remove the Thermostat Housing. Put the thermostat in the engine flange so the valve points up. Remove the thermostat after disconnecting the thermostat housing from the engine.
Wait for the engine to cool. The deeper spring-side end goes into the engine while the shorter end sits in the housing. How to replace a faulty car thermostat.
Use the Appropriate Seal. In most cases the cause of an overheating or no-heat condition in your vehicle is a faulty thermostat. Hold it in place with a self-adhesive gasket.
Flushing the cooling system of your car can help remove the buildup and deposits that have formed overtime due to normal use of your vehicle. Lift the hood and ensure that it is secured so that there is no risk of it dropping and causing injury. This will confirm the continuously low temperature reading of the temperature gauge on your dashboard.
CARSCOM A car thermostat is responsible for preventing your engine from overheating. Clean the Mating Surfaces. The first step necessary to replace a car thermostat is to gain access to it.
Opportune Times To Replace A Thermostat. Then apply a bead of RTV sealant. While wearing a thick pair of gloves put a rag over the radiator cap.
Slide the thermostat into the port on your engine and push it in tightly. We tend to agree that thermostats normally last a long time and so replacing them too soon might not be the best use of your hard-earned car parts money. Place the thermostat into the engine.
With a normal top-mounted thermostat you need drain only part of the cooling system. The thermostat housing is the blocky metal piece connected to your engine block that the hose was attached to. If the new thermostat and the gasket thats included with it arent exactly like the old ones go back to the store for the right ones.
If both test points remain at about the same low temperature your car thermostat is stuck opened. Do not drain it while the engine is hot you may be scalded. Replacing a car thermostat includes the draining and refilling of your vehicles cooling system so you may also consider performing a cooling system flush while you are replacing the thermostat.
If there is a tab it goes through a slot in the thermostat flange. Make sure the thermostats ring fits perfectly in the port or else coolant will be able to leak through. Access to the Thermostat Housing.
A Systematic Approach to Car Thermostat Replacement. Therefore if the cooling system is already open for major repairs such as water pump or radiator replacement it is recommended to install a new thermostat simply as insurance against future breakdown. Use a socket wrench to loosen the bolts holding the housing in place and set them aside so you dont lose them.
All thermostats eventually fail. Partially drain the cooling system first.